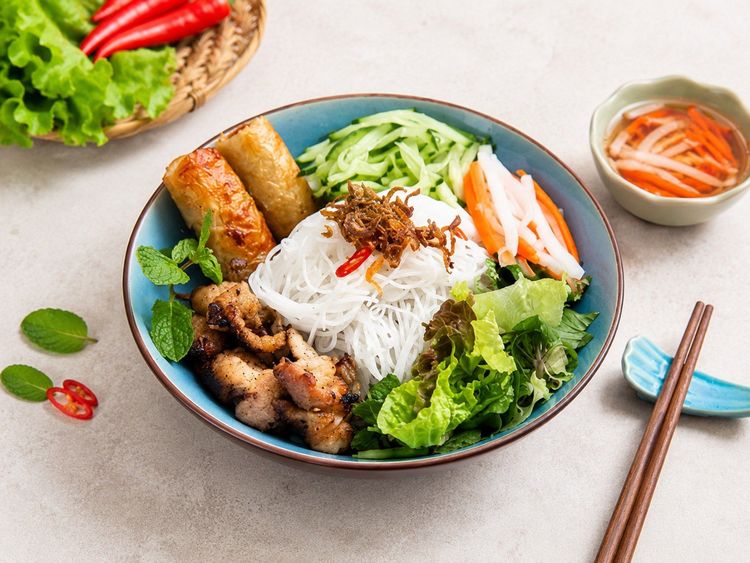
Cha Gio Recipe - Vietnamese Fried Spring Rolls
Published: Aug 20, 2026 by CHIN-SU
Updated: Sep 8, 2026 by CHIN-SU
Tested by CHIN-SU Kitchen Team
Cha gio (chả giò) is a Vietnamese fried spring roll known for its crispy wrapper, savory filling, and fresh herb-based serving style. The dish is commonly associated with Southern Vietnamese cuisine, while regional variations across Vietnam use different names, ingredients, and serving methods.
Chả giò is a familiar part of Vietnamese gatherings, including Tết celebrations, weddings, and family meals. The combination of a hot, crunchy roll, flavorful filling, lettuce, herbs, pickles, and nước chấm creates the contrast that makes this dish widely enjoyed.
This recipe focuses on the techniques behind crisp homemade chả giò, including preparing a balanced filling, controlling moisture, rolling tightly, chilling before frying, and maintaining proper oil temperature. CHIN-SU shares a from-scratch chả giò recipe, along with tips for frying, serving, and storing the rolls.
The recipe takes about 2 hours 30 minutes, including preparation, chilling, and frying, and makes 50 rolls. Serve them with lettuce, fresh herbs, cucumber, pickled carrot and daikon, and a bowl of nước chấm.
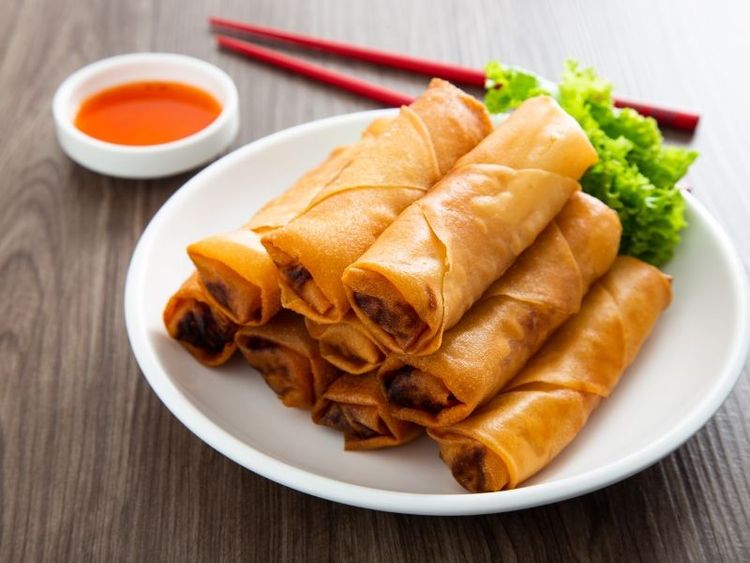
Table Of Contents
- What Is Cha Gio?
- Why You'll Love Cha Gio?
- Cha Gio Ingredients
How to Make Cha Gio Step by Step?
- Step 1: Grind the Pork and Shrimp
- Step 2: Fry the Shallots and Garlic
- Step 3: Season the Meat
- Step 4: Shred and Dry the Vegetables
- Step 5: Mix the Filling
- Step 6: Set Up Your Wrappers and Sealer
- Step 7: Roll the Cha Gio
- Step 8: Chill the Rolls
- Step 9: Heat the Oil and Add the Rolls
- Step 10: Fry Until Golden
- Step 11: Stand the Rolls Upright to Cool
- Step 12: Make the Dipping Sauce
- What To Eat With Cha Gio?
- Tips for the Best Cha Gio
- What Can You Substitute or Change in Cha Gio?
- How to Store and Freeze Cha Gio?
What Is Cha Gio?
Cha gio is a Vietnamese fried spring roll made by wrapping a seasoned filling in a thin frying wrapper and deep-frying it until the exterior becomes golden and crisp. The filling commonly includes pork, shrimp, taro, carrot, wood ear mushrooms, and glass noodles. English speakers usually say cha gio close to "chah yaw," following the southern pronunciation, while the northern one comes out closer to "chah zaw" ([ca˧ˀ˦˥ zɔ˨˩]).
The dish has different names across Vietnam:
- Chả giò is the common Southern Vietnamese name.
- Nem rán is widely used in Northern Vietnam.
- Chả ram appears in some Central Vietnamese regions.
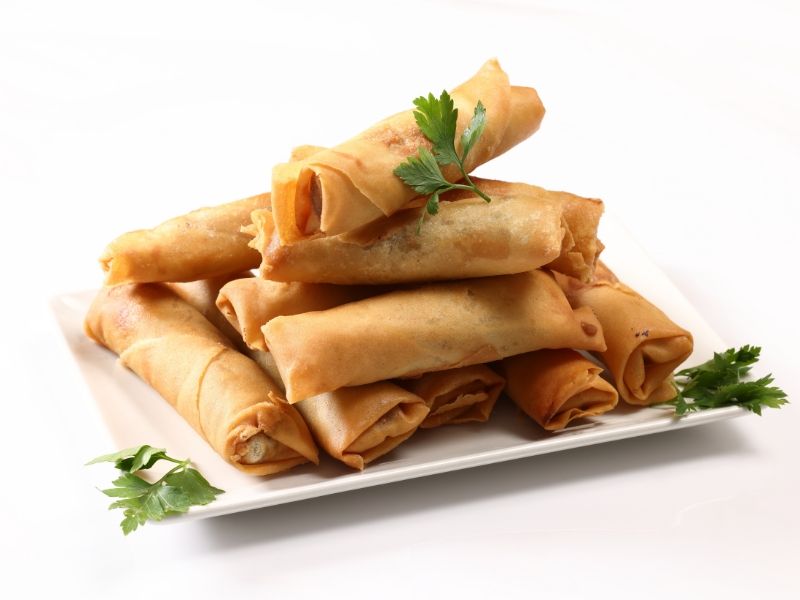
These names reflect regional language differences and culinary traditions rather than completely different dishes. The term “nem” also changes by region, with Northern Vietnamese cuisine using it more broadly for several types of rolls, while Southern Vietnamese cuisine uses more specific names for different preparations.
Regional versions can also differ in fillings, wrapper styles, and serving methods. Southern-style chả giò commonly uses pork, shrimp, taro, and glass noodles, while other regions adapt the recipe based on local ingredients.
In English-speaking restaurants, chả giò may appear as Vietnamese fried spring rolls, Vietnamese egg rolls, or imperial rolls. These names describe related interpretations of the dish, but chả giò remains rooted in Vietnamese culinary traditions.
Why You'll Love Cha Gio?
You’ll love this cha gio recipe because the rolls stay crisp through careful moisture control before and after frying.
- The wrapper stays crisp while the filling stays juicy. Drying the vegetables, controlling filling moisture, chilling the rolls before frying, and draining them properly after frying all help prevent a soft wrapper.
- The batch size is perfect for sharing. This recipe makes about 50 rolls, making it suitable for Tết, family gatherings, parties, or freezing for future meals.
- The rolls freeze well before frying. Prepare the full batch ahead, store the uncooked rolls properly, and fry only the amount you need each time.
- Rolling becomes easier with practice. The first few rolls take longer, but the repeated folding motion becomes faster once your hands get familiar with the process.
Cha Gio Ingredients
This cha gio recipe has five component groups: the pork and shrimp filling, aromatics and seasoning, vegetables and noodles, wrappers and frying setup, and nước chấm with fresh vegetables.
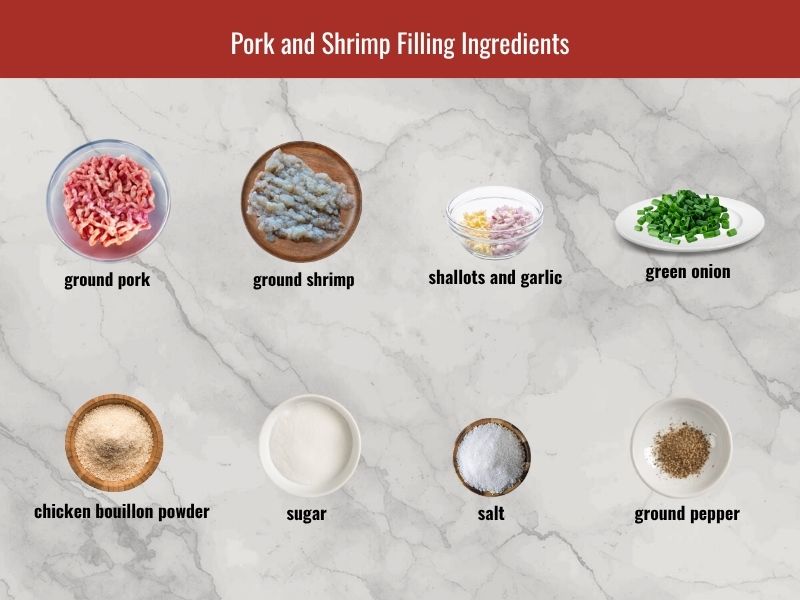
Pork and Shrimp Filling
- 1.1 lb (500 g) ground pork. Pork with some fat keeps the filling juicy instead of dry after frying.
- 10.6 oz (300 g) shrimp, peeled and ground. Shrimp adds sweetness and a firmer texture to the filling.
- 1.8 oz (50 g) shallots and 0.7 oz (20 g) garlic, minced. Fried aromatics add depth and fragrance to the meat mixture.
- 1 oz (30 g) green onion, finely sliced. Green onion adds freshness to balance the cooked aromatics.
- 1½ tbsp chicken bouillon powder.
- 1½ tbsp sugar.
- 1 tsp salt.
- 1 tsp ground pepper.
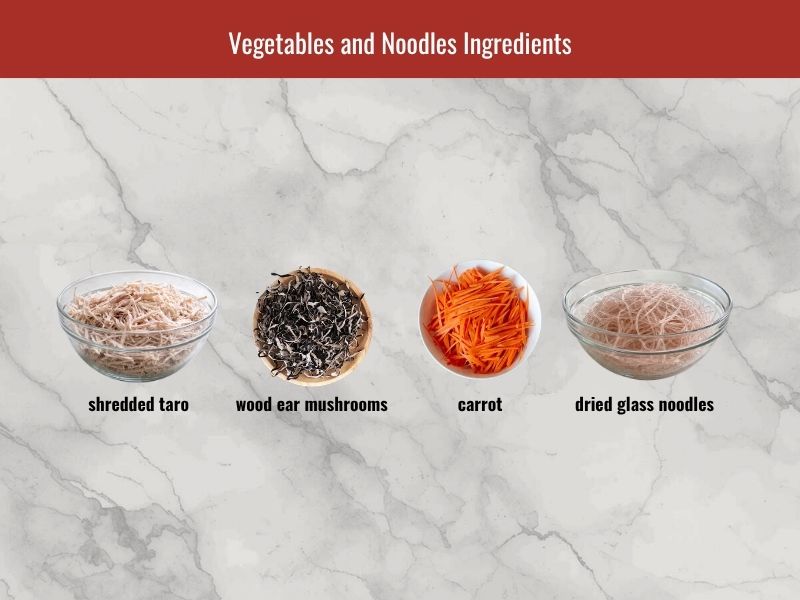
Vegetables and Noodles
- 12.3 oz (350 g) taro (khoai môn), shredded. Taro creates the soft texture and mild sweetness commonly found in Southern-style chả giò.
- 5.3 oz (150 g) carrot, shredded. Carrot adds sweetness and color.
- 2.8 oz (80 g) rehydrated wood ear mushrooms (nấm mèo), soaked and sliced. Wood ear mushrooms add a crunchy texture that contrasts with the filling.
- 2.1 oz (60 g) dried glass noodles (bún tàu), soaked briefly and cut short. Glass noodles absorb moisture inside the roll without adding excess water.
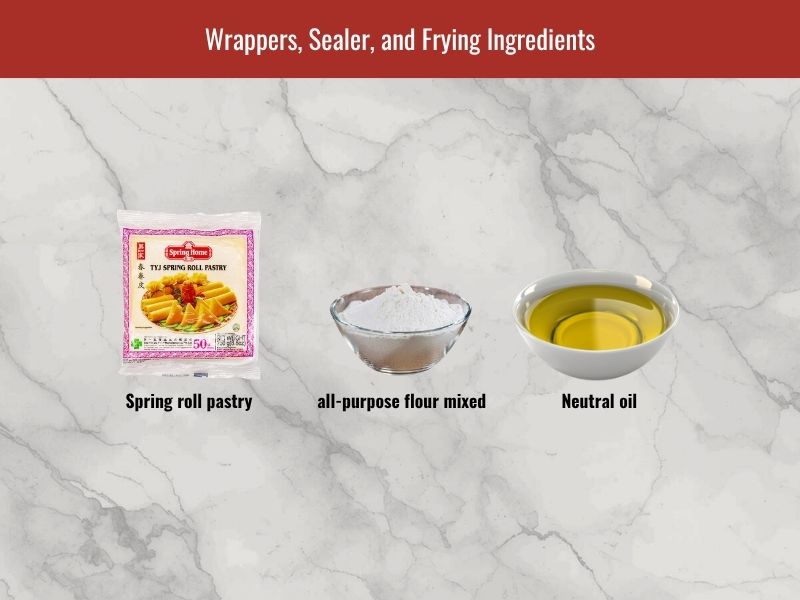
Wrappers, Sealer, and Frying
- 2 packs of spring roll pastry (bánh tráng chả giò), about 50 sheets. Spring roll pastry is designed for deep frying and creates the thin, crisp wrapper that defines Vietnamese fried spring rolls. Choose thin, flexible sheets that can be rolled without cracking and fry evenly.
- 1 tsp all-purpose flour mixed with 2 tbsp water. The flour-and-water paste seals the final edge of each roll so it does not unwrap on you in the oil.
- 1 tsp all-purpose flour mixed with 2 tbsp water, for sealing. The flour paste helps keep the rolls closed during frying.
- Neutral oil, enough for deep frying.
Some Vietnamese styles also use specialty wrappers such as chả giò rế for a lacy, crispy texture.
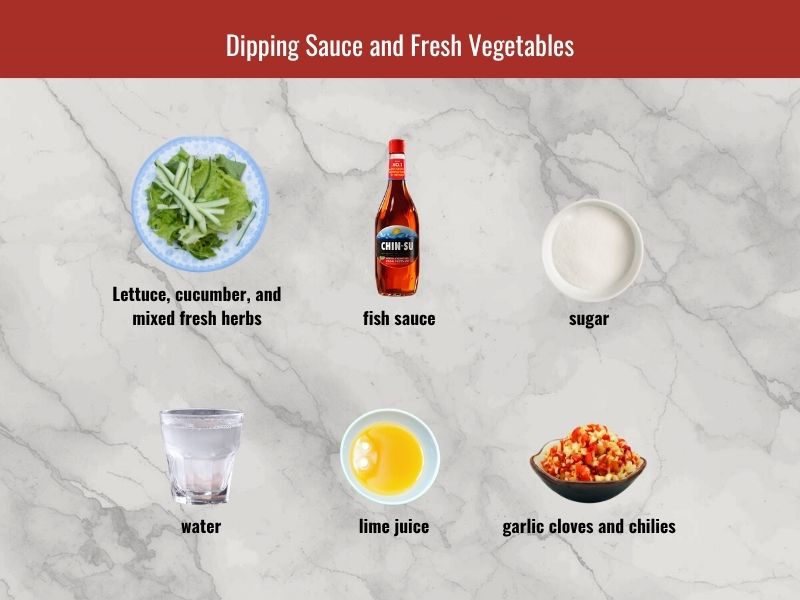
Dipping Sauce (Nước Chấm) and Serving Plate
The greens here are not garnish; they are half of every bite, and your quantities stay loose.
- Lettuce, cucumber, and mixed fresh herbs. The greens go on your table by the plateful, and the exact mix comes down to preference rather than a fixed list.
- 3 tbsp fish sauce. Fish sauce provides the savory base of the dipping sauce and determines its saltiness and depth of flavor.
- 3 tbsp sugar. Sugar balances the saltiness of the fish sauce.
- 6 tbsp warm water. Warm water helps dissolve the sugar evenly.
- 1 tbsp fresh lime juice. Lime juice adds acidity and freshness to the sauce.
- 2 garlic cloves and 1–2 fresh chilies, finely minced. Garlic and chili add aroma and heat to the dipping sauce.
How to Make Cha Gio Step by Step?
Making cha gio takes 12 main steps and about 2 hours 30 minutes, including 1 hour 15 minutes of preparation, 30 minutes of chilling, and 45 minutes of frying. The process includes preparing the filling, drying vegetables, rolling, chilling, frying, and making the dipping sauce. This recipe produces 50 rolls.
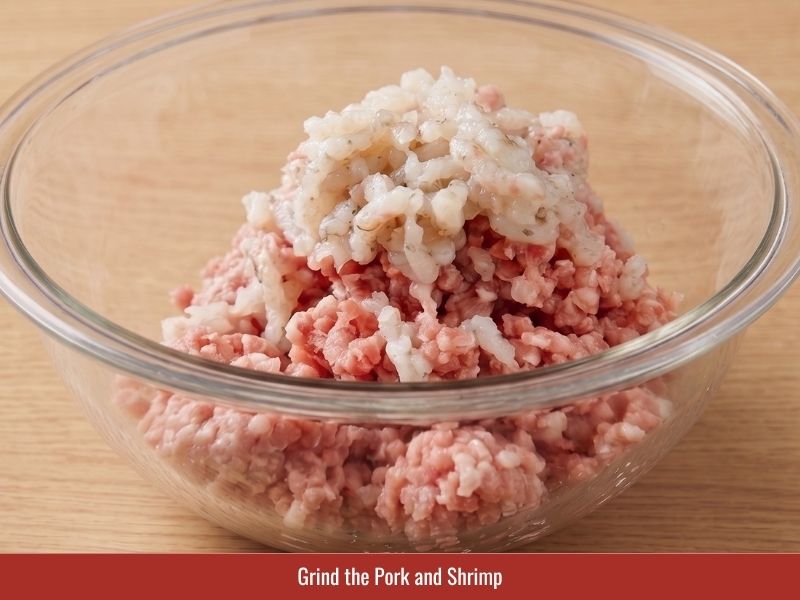
Step 1: Grind the Pork and Shrimp
Clean the pork belly, trim any excess skin if needed, and cut it into smaller pieces before grinding until finely minced.
Peel and devein the shrimp, then pat them dry before grinding separately. Keeping both pork and shrimp dry helps reduce excess moisture in the filling and keeps the cha gio wrapper crisp after frying.
Store-bought ground pork can also be used, but freshly ground shrimp helps create the firm texture and natural sweetness of the filling.
Step 2: Fry the Shallots and Garlic
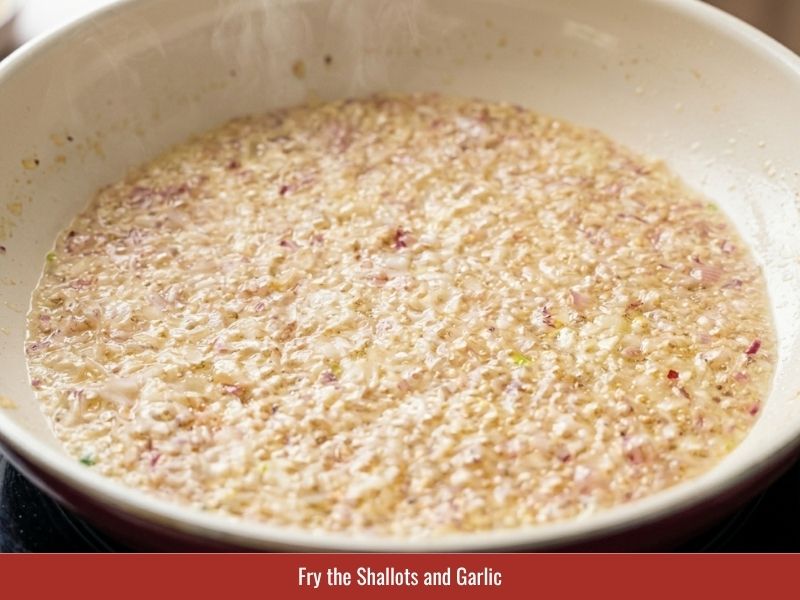
Mince the shallots and garlic, heat 2 tbsp oil in a pan, and fry them until fragrant, stopping while they are still pale rather than letting them brown. Two things happen when you cook them first.
Fried aromatics carry far more aroma into the meat than raw ones do. And because they are already cooked, your filling keeps longer without the smell shifting the way raw shallots do as they sit.
Step 3: Season the Meat
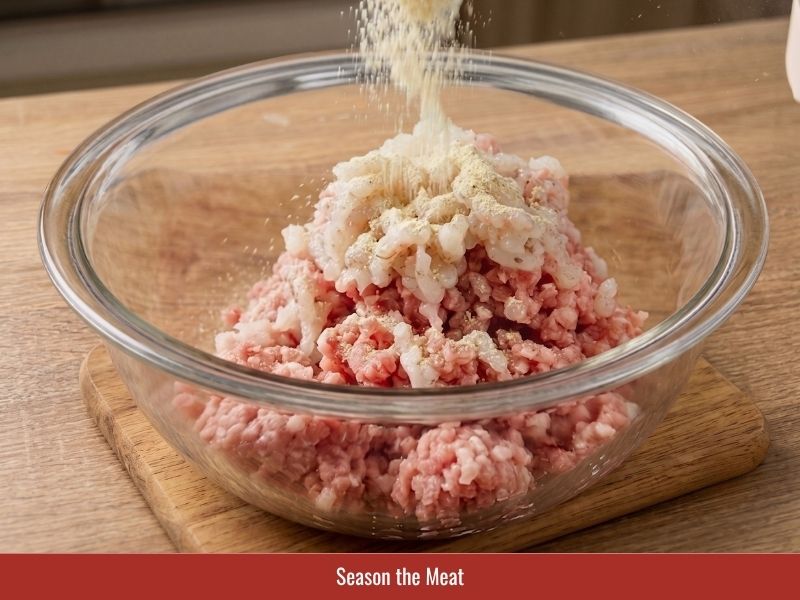
Put the ground pork and shrimp in a large bowl, then add 1½ tbsp chicken bouillon powder, 1½ tbsp sugar, 1 tsp salt, and 1 tsp ground pepper. Add all of the fried shallots and garlic along with the sliced green onion, and mix until the seasoning is evenly distributed. Leave the meat to take up the seasoning while you prepare the vegetables.
Cook a small spoonful of the filling and taste it before rolling the full batch. This allows you to adjust the seasoning before preparing approximately 50 rolls.
Step 4: Shred and Dry the Vegetables
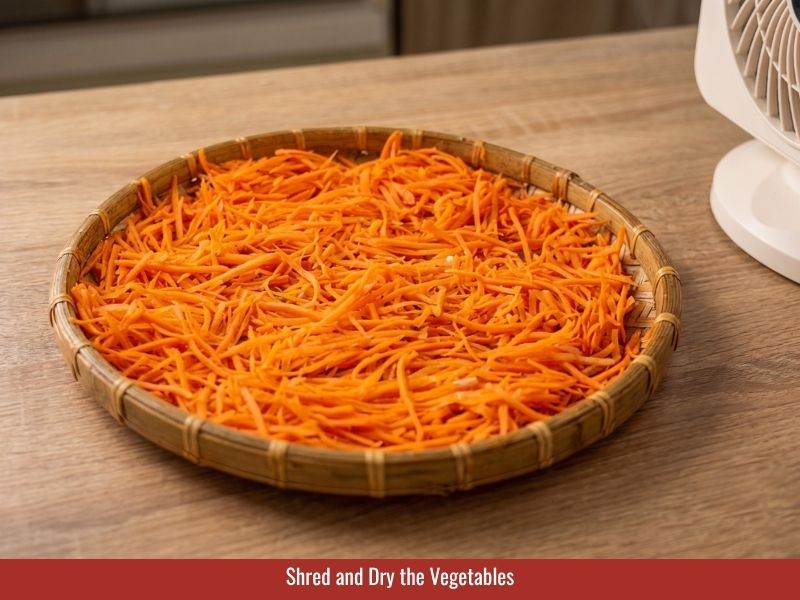
Shred the taro into short strands, roughly 1¼ to 1½ inches (3 to 4 cm) long, and shred the carrot the same way. Now spread everything out on a tray and fan the shredded vegetables for about 30 minutes, so the surface moisture evaporates before any of it reaches your filling. Less water in the filling means the rolls stay crisp longer, and this is the step most home cooks skip.
Slice the rehydrated wood ear mushrooms into slightly larger pieces to preserve their crunchy texture. Soak the glass noodles for about 3 minutes until flexible, then cut them into ¾ to 1¼ inch (2 to 3 cm) lengths.
Step 5: Mix the Filling
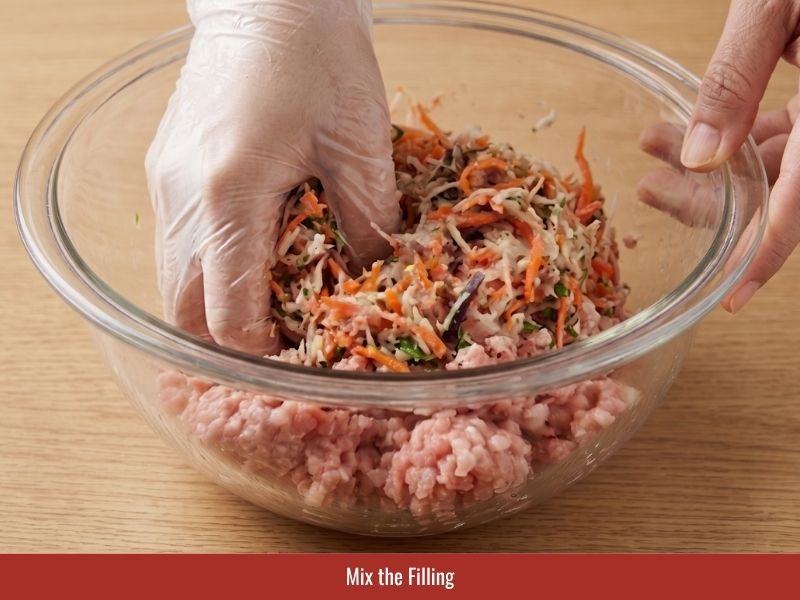
Add the taro, carrot, wood ear mushrooms, and glass noodles to the seasoned meat. Mix with your hands, wearing gloves, until the filling is evenly distributed. Hands do this better than a spoon, since the vegetables need to be distributed through the meat rather than stirred around in it.
Step 6: Set Up Your Wrappers and Sealer
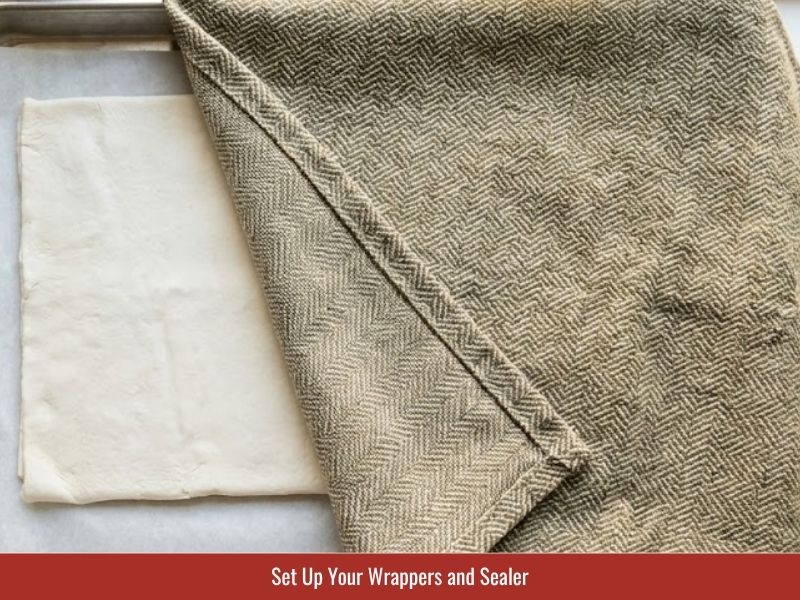
Take the spring roll pastry from the freezer 30 minutes before you roll. Separate the sheets into a stack so you can grab them one at a time. Keep the stack covered with a cloth, or the sheets dry out while you work. Mix 1 tsp flour with 2 tbsp water in a small bowl for your sealer, and beaten egg works in its place.
Step 7: Roll the Cha Gio
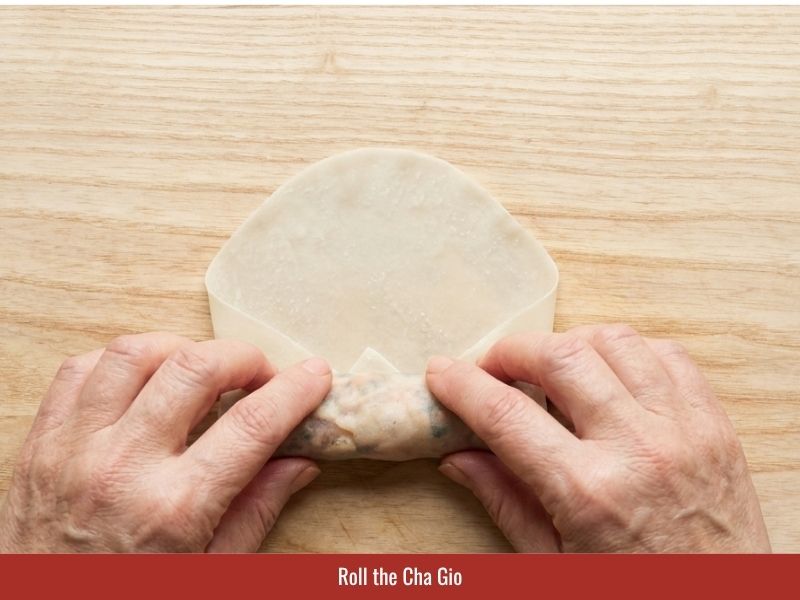
Work from the pointed corner. Lay a sheet down, spoon a portion of filling across it, and spread that filling into an even log. Fold the corner over the filling, fold both ends in evenly, then roll forward. Seal the last edge with the flour paste so the roll does not open in the oil.
Keep your rolls moderate in size while you work. An oversized roll looks clumsy and comes out less crisp, since a thicker roll holds more moisture at its center. Aim for snug rather than maximally tight, and press the air out as you go. Rolling too loose makes the rolls burst when they hit the oil, and rolling too tight burns the outside before the filling has cooked through.
Step 8: Chill the Rolls
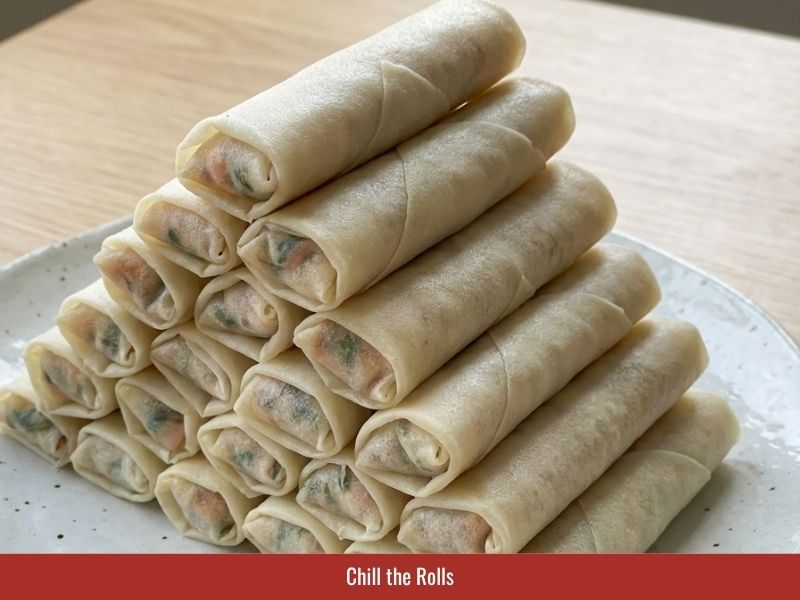
Place the rolled cha gio in the refrigerator for at least 30 minutes before frying. Chilling allows the wrapper surface to dry slightly, which helps the rolls fry more evenly and develop a crisp texture.
Arrange the rolls in a single layer and avoid stacking them while chilling. Leave enough space between each roll so moisture can escape instead of transferring between wrappers.
Step 9: Heat the Oil and Add the Rolls
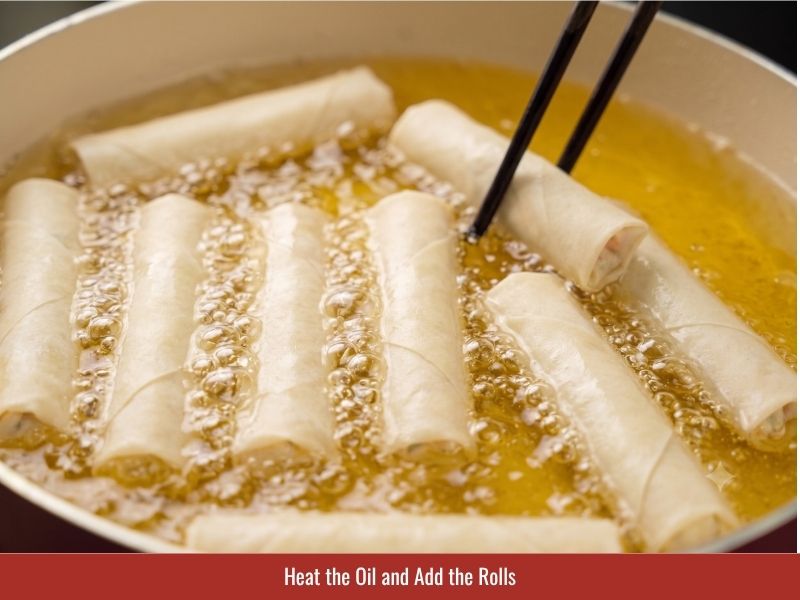
Pour enough oil into the pan to fully submerge the rolls and heat it to about 302°F (150°C). If you do not have a thermometer, dip a chopstick into the oil; steady bubbles forming around it indicate that the oil is ready.
Add the cha gio gradually and fry over medium heat, turning them occasionally so they cook and color evenly. Do not add too many rolls at once because the wrappers can blister immediately and stick together before the surface sets.
Allow a few seconds between batches so each roll has enough space to fry without the wrappers touching.
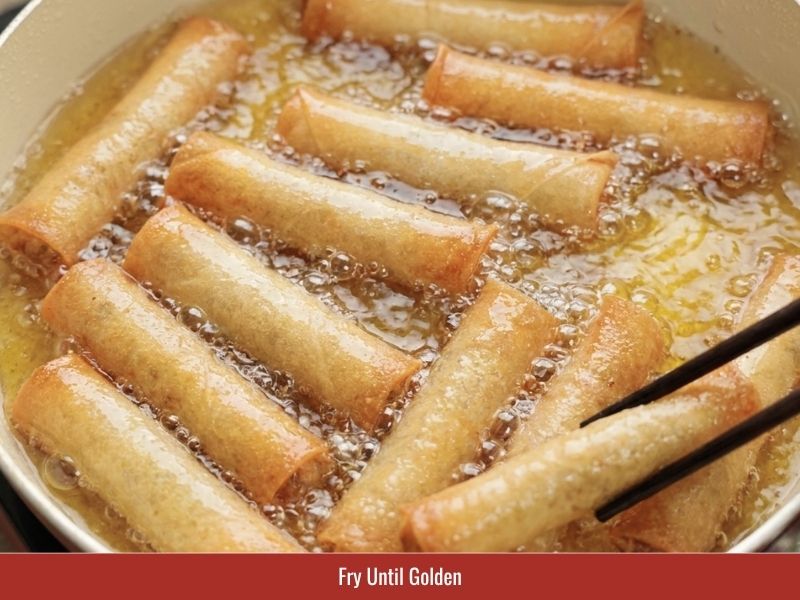
Step 10: Fry Until Golden
Leave the rolls undisturbed during the first few minutes of frying while the wrappers are still soft. Once the outer layer firms up, gently separate any rolls that are touching with tongs.
The bubbles and blisters on the wrapper are normal and create the characteristic texture of fried cha gio. Continue frying until the rolls turn evenly golden.
For the final stage, slightly increase the heat before removing the rolls. This helps reduce excess oil absorption as they leave the pan. Transfer them to paper towels or a rack to drain.
When frying a large batch, work in smaller batches and remove each group together so every roll spends a similar amount of time in the oil.
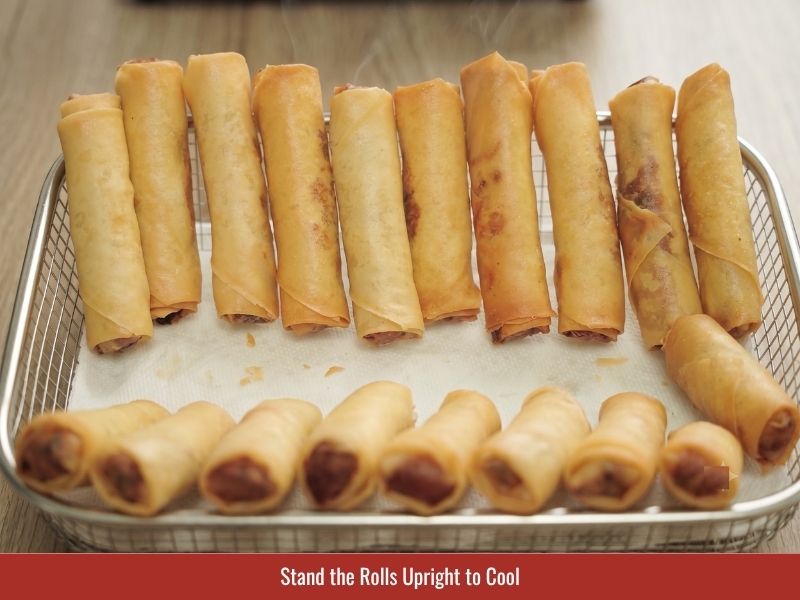
Step 11: Stand the Rolls Upright to Cool
Place the fried cha gio upright as they cool, and do not stack them. Stacking traps steam between the rolls and softens the crispy wrapper.
Allow the rolls to rest briefly before serving. The shell continues to firm up as excess steam escapes, helping maintain the crisp texture.
Step 12: Make the Dipping Sauce
Combine 3 tbsp fish sauce, 3 tbsp sugar, 6 tbsp warm water, and 1 tbsp fresh lime juice in a small bowl. Stir until the sugar dissolves completely.
Add 2 minced garlic cloves and 1–2 minced fresh chilies at the end so their aroma and heat remain noticeable in the sauce.
CHIN-SU Premium Vietnamese Fish Sauce can be used as the fish sauce base for this nước chấm. Taste the sauce after mixing and adjust the balance if needed, as different fish sauces vary in saltiness and intensity.
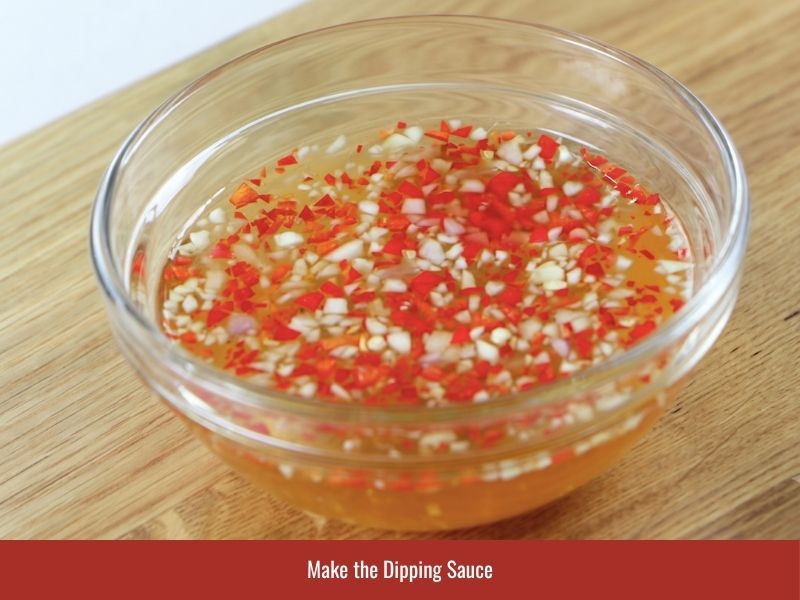
The finished nước chấm should balance salty fish sauce, sweet sugar, sour lime juice, and spicy fresh chili. For a more detailed guide on preparing this Vietnamese dipping sauce, see our nước chấm fish sauce recipe.
Serve the cha gio with the dipping sauce while the rolls are still warm and crisp.
What To Eat With Cha Gio?
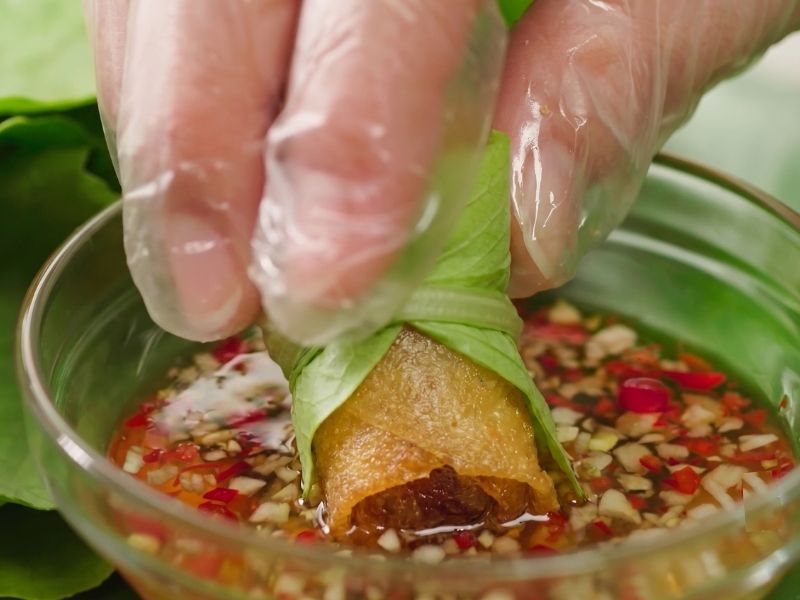
Cha gio is traditionally served with lettuce, cucumber, fresh herbs, pickled vegetables, and nước chấm, allowing each person to build their own bite at the table. The typical serving method is:
- Place a fried roll on a lettuce leaf.
- Add fresh herbs, cucumber, and pickled vegetables.
- Wrap the lettuce around the roll.
- Dip it into nước chấm and eat while the wrapper is still crisp.
Cha gio can also be enjoyed without wrapping or dipping, but the combination of crispy rolls, fresh greens, and dipping sauce is the classic Vietnamese serving style.
For a larger meal, fried rolls are often cut into pieces and served over rice vermicelli, turning leftover cha gio into a complete noodle dish. They are also commonly included on shared Vietnamese tables during Tết, weddings, and family gatherings.
Because this recipe makes about 50 rolls, leftover cha gio can be served in different ways rather than eaten the same way every time.
Tips for the Best Cha Gio
These five techniques make the biggest difference between crisp cha gio and soft fried rolls.
- Control moisture at every stage. Dry the meat, reduce moisture from shredded vegetables, briefly soak the noodles, and chill the rolled pieces before frying. Each step helps prevent steam from softening the wrapper.
- Fry the shallots and garlic before mixing the filling. Cooked aromatics release deeper flavor and stay more stable while the filling rests.
- Keep the rolls a moderate size. Oversized rolls trap more moisture in the center, making the wrapper harder to crisp evenly.
- Fry in small batches. Overcrowding lowers the oil temperature and causes the rolls to absorb more oil instead of developing a crisp shell.
- Double fry for large gatherings. Fry the rolls once, let them cool, then briefly fry them again before serving. This method makes it easier to prepare a large batch while keeping the wrapper crisp.
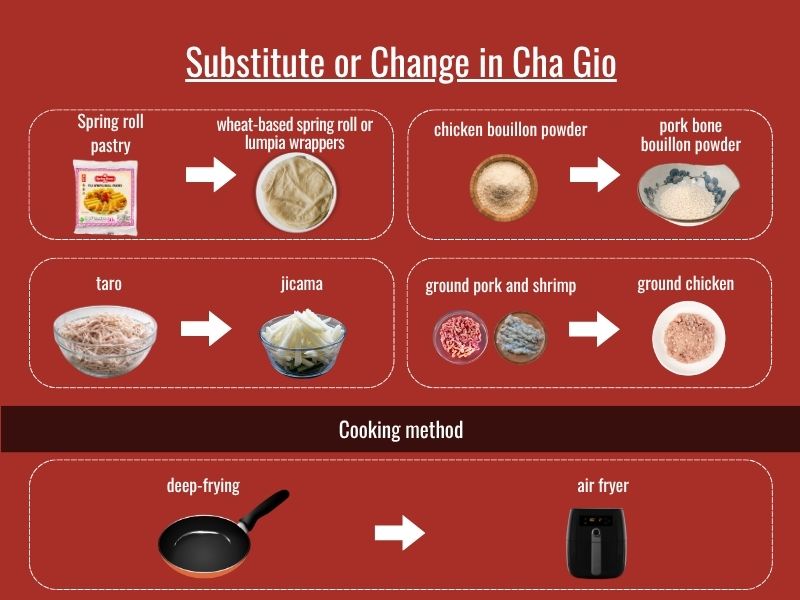
What Can You Substitute or Change in Cha Gio?
These substitutions help you adapt cha gio ingredients based on availability while keeping the dish’s key characteristics: a crisp wrapper and a savory, balanced filling.
- Spring roll pastry (chả giò wrappers) can be replaced with other frying wrappers such as wheat-based spring roll wrappers or lumpia wrappers. The texture will change because wheat wrappers create a thicker, more uniform shell compared with traditional Vietnamese-style fried wrappers.
- Taro (khoai môn) can be replaced with jicama or sweet potato. Jicama creates a crunchier and more watery filling, while sweet potato adds more sweetness. Because taro provides starch and softness, any replacement changes the final filling texture.
- Chicken bouillon powder can be replaced with pork bone bouillon powder. Both provide savory depth and work as seasoning bases for the filling.
- Ground pork and shrimp can be replaced with ground chicken or pork only. Ground chicken creates a leaner filling with less fat, while removing shrimp reduces the natural sweetness and firmer bite of the original filling.
- Deep-frying can be replaced with air frying. Air frying reduces oil but creates a different result, with a drier surface and less blistering than deep-fried cha gio. Brush the rolls lightly with oil before air frying to improve browning and crispness.
How to Store and Freeze Cha Gio?
Freeze raw cha gio before frying for the best texture. Since this recipe makes about 50 rolls, freezing the uncooked rolls allows you to fry smaller batches later while keeping the wrapper crisp and freshly cooked.
After the rolled cha gio has chilled and the surface has dried, arrange the rolls in a single layer and freeze until firm. Transfer them to a freezer-safe container or bag afterward. Freezing them this way prevents the rolls from sticking together and avoids the need for extra flour or oil coatings.
When ready to cook, thaw the rolls overnight in the refrigerator or fry from frozen if your wrapper and filling have been tested for this method. Avoid thawing raw pork-filled rolls at room temperature.
Store cooked cha gio leftovers in an airtight container in the refrigerator for up to 3 days. Reheat them in an air fryer, toaster oven, or convection oven to restore crispness. Avoid microwaving when maintaining the crispy wrapper is important.
Is this your family's cha gio recipe too, or is this the first batch you're rolling? Tell us how it goes in the comments, along with any questions or tweaks you made along the way. Leave a star rating too, so other home cooks can find the recipe.
If you post a photo of your tray, tag it with #CHINSU so we can see it. And if you want to taste what a different fish sauce does to your nước chấm, grab a bottle of CHIN-SU fish sauce at chinsu.com and give it a try.
Frequently Asked Questions
Cha gio is made from a seasoned filling of ground pork and shrimp mixed with ingredients such as taro, carrot, wood ear mushrooms, and glass noodles, then wrapped and fried until crisp. Regional and family recipes may adjust the filling with different vegetables, proteins, or seasonings.
Cha gio and nem ran refer to the same Vietnamese fried-roll tradition, but the names vary by region. Chả giò is commonly used in Southern Vietnam, while nem rán is widely used in Northern Vietnam.
Cha gio is not the same as lumpia, although both are fried Southeast Asian rolls. Cha gio traditionally uses Vietnamese-style fillings and wrappers, while lumpia commonly uses Filipino-style fillings and thin wheat-based wrappers.
Cha gio becomes soggy when excess moisture remains in the filling, oil temperature drops, or hot rolls are stacked while releasing steam. Dry the vegetables, chill the rolls before frying, and cool finished rolls on a rack.
Cha gio usually bursts when the rolls are overfilled, contain trapped air, or are rolled too tightly. Use a moderate filling amount, press out excess air, and seal the wrapper properly.
Yes, raw cha gio freezes well before frying when stored properly. Freeze the rolls in a single layer first, then transfer them to freezer-safe packaging to prevent sticking.
Yes, cha gio can be made without shrimp. The filling will have less sweetness and seafood flavor, but pork-based versions still maintain the structure of the dish.
Yes, you can cook cha gio in an air fryer, although the texture differs from deep frying. Air-fried rolls have a drier surface and less blistering, so brush them lightly with oil before cooking.
Cha Gio (Vietnamese Fried Spring Rolls) Recipe
1. Ingredient
Pork and Shrimp Filling
- 1.1 lb (500 g) ground pork.
- 10.6 oz (300 g) shrimp, peeled and ground.
- 1.8 oz (50 g) shallots, minced.
- 0.7 oz (20 g) garlic, minced.
- 1 oz (30 g) green onion, finely sliced.
- 1½ tablespoons chicken bouillon powder.
- 1½ tablespoons sugar.
- 1 teaspoon salt.
- 1 teaspoon ground pepper.
Vegetables and Noodles
- 12.3 oz (350 g) taro (khoai môn), shredded.
- 5.3 oz (150 g) carrot, shredded.
- 2.8 oz (80 g) rehydrated wood ear mushrooms, soaked and sliced.
- 2.1 oz (60 g) dried glass noodles, soaked and cut short.
Wrappers and Frying
- 2 packs spring roll pastry (bánh tráng chả giò), about 50 sheets.
- 1 teaspoon all-purpose flour mixed with 2 tablespoons water, for sealing.
- Neutral oil, enough for deep frying.
Dipping Sauce (Nước Chấm)
- 3 tablespoons fish sauce.
- 3 tablespoons sugar.
- 6 tablespoons warm water.
- 1 tablespoon fresh lime juice.
- 2 garlic cloves, minced.
- 1–2 fresh chilies, minced.
Serving Sides
- Lettuce.
- Cucumber.
- Mixed fresh herbs.
- Pickled vegetables.
2. Instructions
- Step 1: Grind the Pork and Shrimp. Grind pork and shrimp separately until finely minced. Pat shrimp dry before grinding to reduce excess moisture and help maintain a crisp wrapper after frying.
- Step 2: Fry the Shallots and Garlic. Heat 2 tablespoons oil and fry minced shallots and garlic until fragrant while keeping them pale. Reserve for mixing into the filling.
- Step 3: Season the Meat. Combine pork, shrimp, chicken bouillon powder, sugar, salt, pepper, fried shallots, garlic, and green onion. Mix evenly and cook a small portion to adjust seasoning if needed.
- Step 4: Shred and Dry the Vegetables. Shred taro and carrot into short strands. Spread them out and let surface moisture evaporate for about 30 minutes. Slice wood ear mushrooms and soak glass noodles briefly before cutting them into short pieces.
- Step 5: Mix the Filling. Add taro, carrot, wood ear mushrooms, and glass noodles to the seasoned meat mixture. Mix until the ingredients are evenly distributed.
- Step 6: Prepare the Wrappers and Sealer. Remove spring roll pastry from the freezer about 30 minutes before rolling. Keep wrappers covered to prevent drying. Mix flour with water to create a sealing paste.
- Step 7: Roll the Cha Gio. Place filling on the wrapper, fold the bottom corner over the filling, fold both sides inward, then roll tightly. Seal the final edge with flour paste to prevent opening during frying.
- Step 8: Chill the Rolls. Arrange rolls in a single layer and refrigerate for at least 30 minutes before frying. Chilling helps dry the wrapper surface and improves crispness.
- Step 9: Heat the Oil and Fry the Rolls. Heat oil to about 302°F (150°C). Fry rolls in small batches over medium heat, turning occasionally until the wrappers begin to set.
- Step 10: Fry Until Golden. Continue frying until the rolls become evenly golden and crisp. Drain on paper towels or a rack.
- Step 11: Cool the Rolls Upright. Place fried cha gio upright and avoid stacking to prevent trapped steam from softening the wrapper.
- Step 12: Make the Dipping Sauce. Combine fish sauce, sugar, warm water, and lime juice. Stir until sugar dissolves, then add garlic and chili. Adjust the balance of sweet, salty, sour, and spicy flavors before serving.
3. Storage: Freeze uncooked cha gio before frying for the best texture. Arrange rolls in a single layer, freeze until firm, then transfer to freezer-safe bags or containers. Store cooked cha gio in an airtight container in the refrigerator for up to 3 days. Reheat with an air fryer, toaster oven, or oven to restore crispness.
4. Yield: About 50 rolls
5. Serving Style: Vietnamese fried spring rolls served with lettuce, fresh herbs, pickled vegetables, and nước chấm dipping sauce

CHIN-SU KITCHEN TEAM
CHIN-SU Kitchen Team are the creative experts behind the delicious recipes featuring CHIN-SU sauces. With years of experience and a passion for flavor, our team carefully selects recipes from a variety of trusted chefs and bloggers, bringing together the best culinary insights to present you with the most suitable and exciting dishes. Every recipe is chosen to inspire you to create meals that are not only tasty but also easy to prepare, enhancing your dining experience. Join us as we explore a wide range of sauces and flavors, and elevate every meal with the perfect recipe for your table!
User Reviews
Featured Articles
SUBSCRIBE TO GET
MORE INFO
Want the latest and greatest recipes, updates, and more from us,
straight to your inbox? Subscribe and get our NEWS!